-
[android] android 고급 위젯 다루기2app/android 2021. 10. 28. 19:35반응형
스크롤뷰
xml 코드 자체로 구성이 가능하다
위젯이나 레이아웃이 화면에 넘칠 때 스크롤 효과를 낼 수 있다
스크롤뷰는 수직(위아래)으로 그크롤하는 기능
-수평(좌우)으로 스크로하는 수평 스크롤 뷰는 따로 존재한다
스크롤뷰에는 단 하나의 위젯만 넣을 수 있다
주로 스크롤뷰 안에 리니어레이아웃을 1개 넣고, 리니어레이아웃 안에 자신이 원하는것을
여러가 넣는 방법을 사용한다
<?xml version="1.0" encoding="utf-8"?>
<ScrollView xmlns:android="http://schemas.android.com/apk/res/android"
xmlns:app="http://schemas.android.com/apk/res-auto"
xmlns:tools="http://schemas.android.com/tools"
android:layout_width="fill_parent"
android:layout_height="fill_parent"
android:orientation="vertical"
tools:context=".MainActivity">


    <LinearLayout
        android:layout_width="fill_parent"
        android:layout_height="fill_parent"
        android:orientation="vertical" >

        <Button
            android:layout_width="match_parent"
            android:layout_height="100dp"
            android:text="button1" />

        <Button
            android:layout_width="match_parent"
            android:layout_height="100dp"
            android:text="button2" />

        <Button
            android:layout_width="match_parent"
            android:layout_height="100dp"
            android:text="button3" />

        <Button
            android:layout_width="match_parent"
            android:layout_height="100dp"
            android:text="button4" />

        <Button
            android:layout_width="match_parent"
            android:layout_height="100dp"
            android:text="button5" />

        <Button
            android:layout_width="match_parent"
            android:layout_height="100dp"
            android:text="button6" />

        <Button
            android:layout_width="match_parent"
            android:layout_height="100dp"
            android:text="button7" />


    </LinearLayout>


</ScrollView>
실행결과야 뻔하니 skip
슬라이딩드로어
슬라이딩드로어의 handle 속성에 지정된 이름과 슬라이딩드로어의 손잡이 역할을
하는 버튼의 id가 동일해야 한다
버튼 대신 이미지뷰나 이미지버튼으로 사용해도 상관없다
슬라이딩드로어의 content 속성에 지정된 이름과 리니어레이아웃의 id도 동일해야한다
리니어레이아웃이 아닌 다른 레이아웃도 가능하다
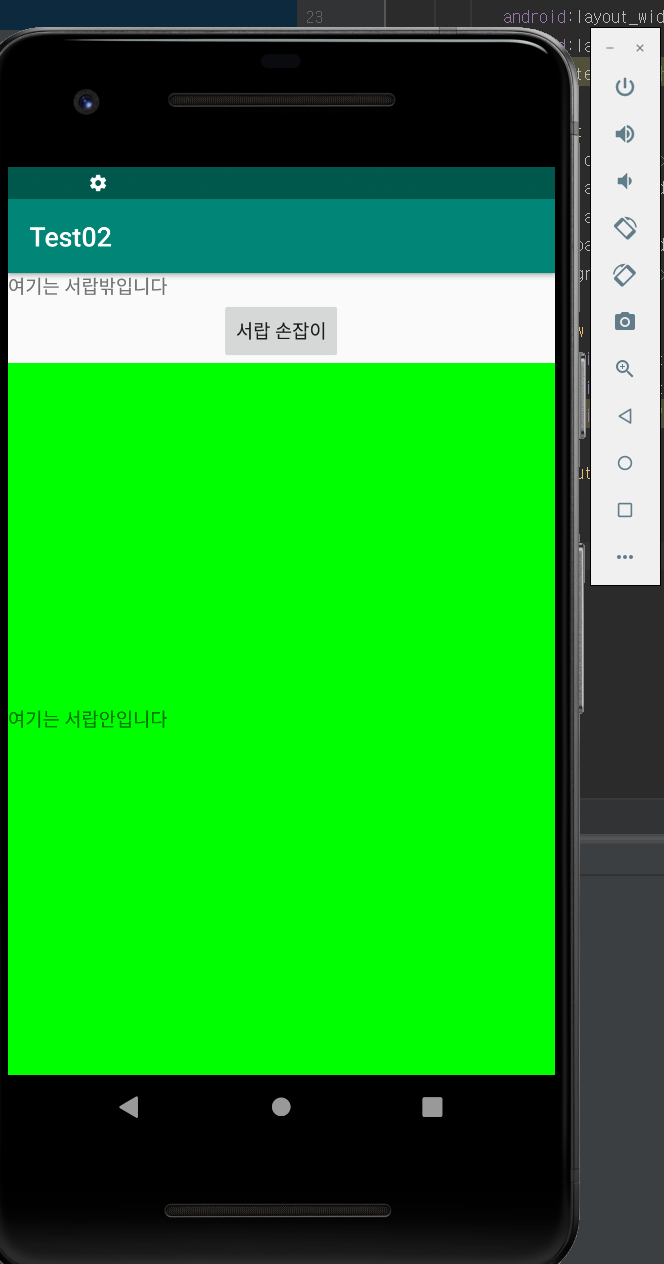
<?xml version="1.0" encoding="utf-8"?>
<LinearLayout xmlns:android="http://schemas.android.com/apk/res/android"
xmlns:app="http://schemas.android.com/apk/res-auto"
xmlns:tools="http://schemas.android.com/tools"
android:layout_width="fill_parent"
android:layout_height="fill_parent"
android:orientation="vertical"
tools:context=".MainActivity">

    <TextView
        android:layout_width="wrap_content"
        android:layout_height="wrap_content"
        android:text="여기는 서랍밖입니다" />

    <SlidingDrawer
        android:layout_width="wrap_content"
        android:layout_height="wrap_content"
        android:content="@+id/content"
        android:handle="@+id/handle">

        <Button
            android:id="@+id/handle"
            android:layout_width="wrap_content"
            android:layout_height="wrap_content"
            android:text="서랍 손잡이" />

        <LinearLayout
            android:id="@+id/content"
            android:layout_width="match_parent"
            android:layout_height="wrap_content"
            android:background="#00FF00"
            android:gravity="center">

            <TextView
                android:layout_width="match_parent"
                android:layout_height="wrap_content"
                android:text="여기는 서랍안입니다" />

        </LinearLayout>

    </SlidingDrawer>


</LinearLayout>
실행결과
손잡이를 위로 당겼다 내렸다 할 수 있다.
<실습> 간단 웹브라우저 만들기
activity_main.xml
<?xml version="1.0" encoding="utf-8"?>
<LinearLayout xmlns:android="http://schemas.android.com/apk/res/android"
    xmlns:app="http://schemas.android.com/apk/res-auto"
    xmlns:tools="http://schemas.android.com/tools"
    android:layout_width="match_parent"
    android:layout_height="match_parent"
    android:orientation="vertical"
    tools:context=".MainActivity">


    <LinearLayout
        android:layout_width="match_parent"
        android:layout_height="wrap_content" >
            <EditText
                android:layout_width="wrap_content"
                android:layout_height="wrap_content"
                android:id="@+id/edtUrl"
                android:layout_weight="1"
                android:singleLine="true"
                android:hint="url을 입력하세요"> // url을 입력할 창 만들어주기
            </EditText>
        <Button
            android:id="@+id/btnGo"
            android:layout_width="wrap_content"
            android:layout_height="wrap_content"
            android:text="이동" /> //이동버튼
        <Button
            android:id="@+id/btnBack"
            android:layout_width="wrap_content"
            android:layout_height="wrap_content"
            android:text="이전" /> //이전버튼

    </LinearLayout>
    <WebView
        android:id="@+id/webView"
        android:layout_width="match_parent"
        android:layout_height="match_parent" /> //아래웹뷰를 만들어준당
</LinearLayout>
MainActivity.kt
package kr.ac.dongyang.project6_2

import androidx.appcompat.app.AppCompatActivity
import android.os.Bundle
import android.webkit.WebResourceRequest
import android.webkit.WebSettings
import android.webkit.WebView
import android.webkit.WebViewClient
import kotlinx.android.synthetic.main.activity_main.*

class MainActivity : AppCompatActivity() {

    override fun onCreate(savedInstanceState: Bundle?) {
        super.onCreate(savedInstanceState)
        setContentView(R.layout.activity_main)

        webView.webViewClient = CookWebViewClient()

        var webSet: WebSettings = webView.settings
        webSet.builtInZoomControls = true

        btnGo.setOnClickListener {
            webView.loadUrl(edtUrl.text.toString())
        } //이동 버튼의 액션

        btnBack.setOnClickListener {
            webView.goBack()
        } //이전 버튼의 액션
    }

        class CookWebViewClient : WebViewClient() {
            override fun shouldOverrideUrlLoading(view: WebView?, url: String?): Boolean {
                return super.shouldOverrideUrlLoading(view, url)
                // 웹뷰 클래스를 만들어서 브라우저에 웹을 띄울 수 있도록 오버라이딩한다
        }
    }
}
(중요) manifest 의 소스 바꾸기
manifest란? 프로젝트의 전반적인 환경을 설정하는 파일
[app] -> [manigests] click 하면 창이뜬다
이제 바꿔보자
<?xml version="1.0" encoding="utf-8"?>
<manifest xmlns:android="http://schemas.android.com/apk/res/android"
    package="kr.ac.dongyang.project6_2">

    <uses-permission android:name="android.permission.INTERNET" /> //추가한부분이부분

    <application
        android:allowBackup="true"
        android:icon="@mipmap/ic_launcher" //바꿔도 되지만 굳이?
        android:label="@string/app_name"//바꿔도 되지만 굳이?
        android:roundIcon="@mipmap/ic_launcher_round"
        android:supportsRtl="true"
        android:theme="@style/AppTheme">
        <activity android:name=".MainActivity">
            <intent-filter>
                <action android:name="android.intent.action.MAIN" />

                <category android:name="android.intent.category.LAUNCHER" />
            </intent-filter>
        </activity>
    </application>

</manifest>
실행결과
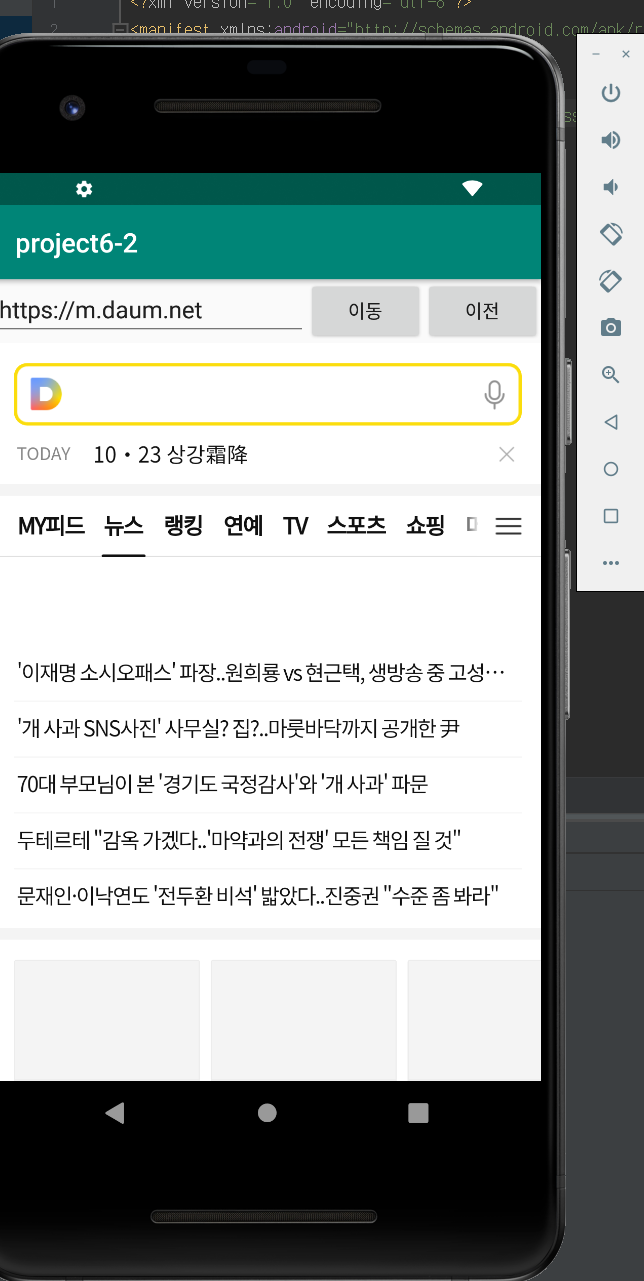
짜잔!@!@!@#@%#%@#$^%@$@!@~~~~~~~~~
 반응형
반응형'app > android' 카테고리의 다른 글
[android] android 파일 처리 , 실습 간단 일기장 (0) 2022.01.13 [android] android 번외 로그인 페이지 만들기 (0) 2021.10.28 [android] android 고급 위젯 다루기1 (0) 2021.10.28 [android] android 레이아웃 익히기 (0) 2021.10.28 [android] android 기본 위젯 익히기2 (0) 2021.10.28