-
[css] 기본 개요codeStates front-end/Css 2023. 1. 4. 09:54반응형
본 실습은 VS CODE로 작성했습니다.
CSS는 독립적으로 사용하지 못한다.
그렇기에 기본 웹사이트를 세팅 후 CSS 알아보기
index.html
<!DOCTYPE html>
<html lang="en">
<head>
  <meta charset="UTF-8">
  <title>Modern CSS</title>
  <link rel="stylesheet" href="index.css" />
</head>
<body>
<header>This is the header.</header>
<div class="container">
  <nav>
    <h4>This is the navigation section.</h4>
    <ul>
      <li>Home</li>
      <li>Mac</li>
      <li>iPhone</li>
      <li>iPad</li>
    </ul>
  </nav>
  <main>
    <h1>This is the main content.</h1>
    <p>...</p>
  </main>
  <aside>
    <h4>This is an aside section.</h4>
    <p>...</p>
  </aside>
</div>
<footer>
  <ul>
    <li>개인정보 처리방침</li>
    <li>이용 약관</li>
    <li>법적 고지</li>
  </ul>
</footer>
</body>
</html>
index.css
body {
  margin: 0;
  padding: 0;
  background: #fff;
  color: #4a4a4a;
}
header, footer {
  font-size: large;
  text-align: center;
  padding: 0.3em 0;
  background-color: #4a4a4a;
  color: #f9f9f9;
}
nav {
  background: #eee;
}
main {
  background: #f9f9f9;
}
aside {
  background: #eee;
}
실습) layout.css 추가하기
index.html
<link rel="stylesheet" href="layout.css" />layout.css
body {
  min-height: 100vh;
  display: flex;
  flex-direction: column;
}
.container {
  display: flex;
  flex: 1;
}
main {
  flex: 1;
  padding: 0 20px;
}
nav {
  flex: 0 0 180px;
  padding: 0 10px;
}
aside {
  flex: 0 0 130px;
  padding: 0 10px;
}
기본적인 셀렉터(selector)
id로 이름 붙여서 스타일링 적용하기
index.html
<h4 id="navigation-title">This is the navigation section.</h4>index.css
#navigation-title {
  color: red;
}
class로 스타일 분류하여 적용하기
index.html
<!-- 바른 예제 -->
<ul><li class="menu-item">Home</li><li class="menu-item">Mac</li><li class="menu-item">iPhone</li><li class="menu-item">iPad</li></ul>
index.css
.menu-item {
  text-decoration: underline;
}
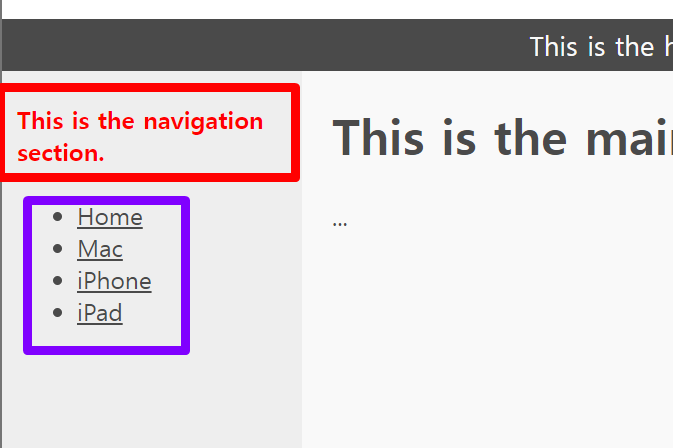
id와 class 적용 결과

id와 class의 차이점
id class #으로 선택 .으로 선택 한 문서에 단 하나의 요소에만 적용 동일한 값을 갖는 요소 많음 특정 요소에 이름을 붙이는 데 사용 스타일의 분류(classification)에 사용 반응형'codeStates front-end > Css' 카테고리의 다른 글
[css] 반응형 웹 (0) 2023.03.16 [css] Selector (0) 2023.01.04 [css] 박스를 구성하는 요소 (0) 2023.01.04 [css] 박스 모델 (0) 2023.01.04 [css] css 속성 (0) 2023.01.04